HOW TO PREPARE FOR THE ARRIVAL
OF YOUR COMMERCIAL RACK SYSTEM
A checklist to follow for mechanical contractors and commercial facility owner-managers
on multi-unit tankless water heater systems.
Tankless water heaters in combination become a potent, problem-solving solution in larger commercial installations. Floor- and wall-mounted multi-unit rack setups — anywhere from two to six tankless heaters — provide flexibility and efficiency in both installation and operation.
Offered by Noritz America, these systems have provided solutions to complex commercial applications, both new and retrofit. A significant labor savings and time savings make the appeal of these multi-unit systems easy to understand.
To help ensure that the installation of these pre-engineered, prefabricated and pre-plumbed packages, delivered on an aluminum frame rack, is problem-free, we have prepared the following checklist that answers the most frequently asked customer questions and concerns — from initial order to operation.


Rack Configurations
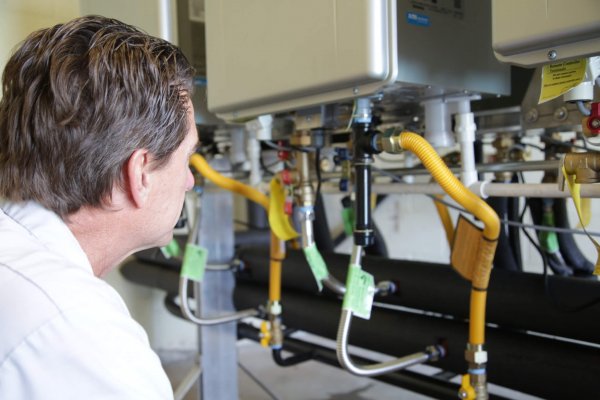
- How do commercial racks save cost and installation labor? There are two rack configurations: wall-mounted and floor-mounted. Each Aluminum frame rack arrives on the job site as a single integrated package, pre-fabricated, pre-plumbed and with the heaters pre-mounted and prewired with a multi-unit system controller. What would typically require a two-person crew several days to build and plumb before moving to the job site can now be put in place, plumbed and vented by one person.
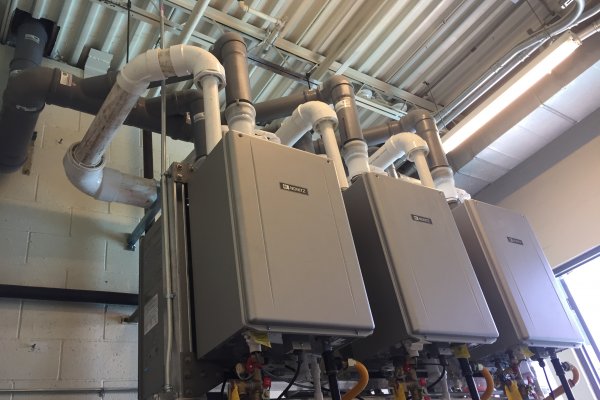
- How many water heaters will I need for my project? The number of heaters varies by system design and rack configuration. A wall-mounted rack can hold up to three tankless water heaters; floor-mounted racks, from two to six. This rack flexibility is designed to ease installation, even in tight settings. In addition, the ability to combine multiple units offers peace of mind through redundancy: if one unit requires shutdown or removal for servicing, the others will continue to meet demand.
- Which model should I purchase? Model No. NCC199CDV is the only heater offered in rack configurations. Thanks to its versatility, it is the only one you will need.
- Where can I find plumbing diagrams for commercial applications? PDF and Cad drawing files can be downloaded at https://www.noritz.com/plumbingdiagrams/
Installation Considerations
- Shipping: Lead times, from order to job-site delivery, average two to four weeks. When the order is completely fabricated, the unit is shipped in engineered crates to protect the contents.
- Upon delivery, check the unit for damage to the rack or the heaters. If damage is evident, refuse the delivery. Take pictures of the damage and report the problem to the local Noritz distributor or sales representative.
- A loading dock or an appropriate forklift is needed to remove the shipping container from the transport vehicle. For example, a six-unit rack is nearly seven feet long, so a conventional forklift will not be sufficient to move the shipment.
- Electrical: While the requirements are minimal, it is worth remembering that each tankless heater in the rack requires a 120-volt connection. Each connection should be either hard-wired directly to an electrical circuit breaker panel or wired with an appropriate 3 prong power cord then plugged into an electrical outlet box installed on the aluminum frame. Both the power cord and electrical outlets are field supplied.
- Space: Tankless typically involves a significantly smaller foot print than a comparable storage tank or boiler package. Still, be sure you have sufficient space for the rack as well as the required piping, venting, and side and front clearance required by code. For wall-mounted rack set-ups, don’t forget to make sure the wall can handle the weight.
- Plumbing: Consider the pipe-size requirements of the heater setup. The flow capacity of two racks piped in series can surpass the flow of the pre-plumbed pipes. Parallel plumbing with a secondary manifold mitigates pressure loss and pipe erosion due to high velocity flow.
- Venting: Again, the NCC199CDV tankless heater offers plenty of versatility for nearly every application. It can be installed indoors or outside. Obviously, with an outdoor installation, venting is not a consideration; however, a rain cap is required to cover the intake and exhaust flues; where the vent pipes normally would connect.
Indoors, there are three venting configurations:
- Direct vent: Here is a two pipe system. One is for combustion air drawn from outdoors and the other is for exhaust.
- Single vent: This case is a single pipe system. An exhaust vent pipe is installed for each heater; the combustion air is drawn from indoors. In this configuration use the Noritz single vent conversion kit (part # SV-CK-2)
- Common venting: A shared 4-, 6- or 8-inch pipe vents up to six heaters. With common venting, remember to install a non-return valve (part # CDVNRVK ) to prevent backflow of exhaust gases from one tankless water heater to another. This valve is available from a local Noritz distributor. Omission of this key step will cause combustion abnormality and trigger operational error codes.
3 types of venting material can be used: polypropylene, PVC, and CPVC. With PVC or CPVC, a Noritz supplied adaptor (part # PP4xPVC-ADAPT) is needed to connect the PVC common vent header to the non-return valve of each tankless water heater.
One final item for your venting checklist: the dip switch settings. Depending on the vent configuration, there are corresponding dip switches located on the circuit board that need to be set. Failure to set these switches can result in error codes or operational issues.
To learn more about tankless water heater rack configurations, contact/visit https://www.noritz.com/racksystem/.
